Below is my final piece for my Fine Art degree, which is now finally finished and I have been enjoying the art exhibitions of which it has been a part of. It has been a long and expensive(!) process making my final piece, but I am really happy with the finished result.
I have been looking at the subject of Nature for my final year of my degree, and I wanted my final piece to be 'wow' piece that brought together the nature/animal/human themes I have been exploring.
My final piece is called 'The Root of our Enlightenment', and it represents the knowledge and life we have gained from nature, the title is also a play on words. The tree is an upturned root, and there are books embedded in to the trunk of the tree which represents 'enlightenment' (knowledge, understanding etc). I covered the tree in gold leaf to allow the internal lights inside, and the 3 around the base to give the tree a real glow and shine. The tree sits on a base plate which is filled with paper leaves which I made from burnt book pages.
Below are images of the making process of my final piece:
The dead Cypressus tree root being dug out in my garden.
The root has been cut in half down the middle and laid out to be power cleaned to get rid of any green and dirt.
The tree root is now clean and has been sanded to reveal the patterned bark underneath.
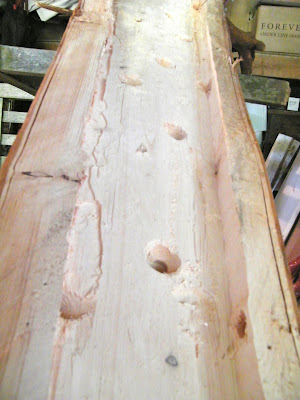
Here I am routing out the middle of the tree to get rid of excess weight and also for the lights to fit down the middle of the trunk.
This is the base plate being cut out, which will hold the tree upright. It had to be thick and heavy to ensure that it would balance the tree.
In the centre of the base plate went 2 metal brackets, they allow the base of the tree to fit on to it and be secured with 4 bolts.
Next, I had to prepare the book ends which fit in to the trunk. I did this by using a stanley knife and repeatedly cutting the pages. Then I was left with just the book ends.
The tree trunk and book ends are ready for the slots to be chiselled out.
This is a slot where the book ends fit in to, as you can see it is not very deep. They were held in place just by using a strong PVA glue.
Next, I had to drill the holes in to the trunk of the tree to allow for the internal lights to shine out. I tapered the holes, which means they were bigger on the inside- this was to allow more light to shine out.
Here is the tree trunk before I covered it in gold leaf. I did like the natural colour of the bark, but felt that the gold leaf was more striking.
Here I was testing out the lights in the darkness- this was to enable me to see where there were gaps down the sides of the tree.
These are the book page leaves that I cut out of the nature books I used in the trunk. I managed to cut out 4 at a time, but it was tedious! I then burnt them using a heat gun to make them look brown and crispy.
This was once the gold leaf had just been applied. It was a long process to cover the whole tree in the leaf, but I was happy with the finished product.
I then had to spray the tree with a fixative varnish so that the gold leaf was secure as without it, its quite fragile.
This is the finished base plate which the tree fixes on to. As you can see it is quite complicated with various wires and sockets. This is so that the internal and external lights can be switched on without being seen.
These are the internal lights, which are fixed on to one side of the tree. This was to make sure that they were secure and wouldn't move once the tree was upright.
And eventually- here is the finished tree! With me standing next to it in my studio space in Loughborough. As you can see it is rather big at 9ft!
Pippa
X


